What you need to know
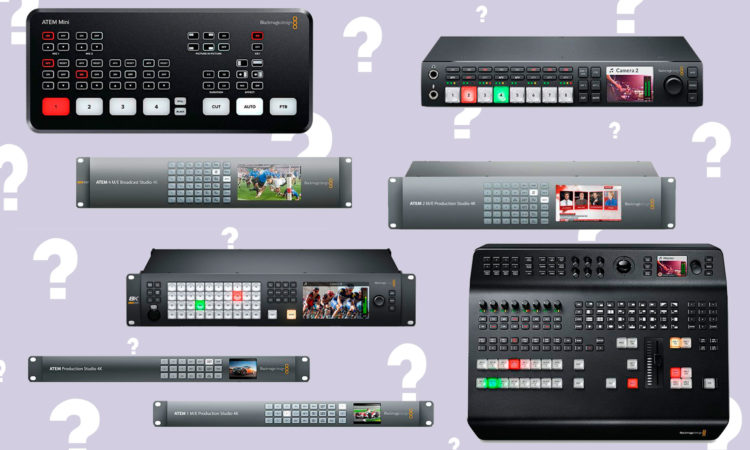
If you work in live production and have multi-camera set ups you’ll know the everyday struggles you come across with your switcher; never enough inputs, outputs and always the wrong feed… But help is at hand, the Blackmagic Design ATEM range is the largest out there, so you should find a mixer that meets your needs.
Before jumping straight in with your ATEM purchase, consider these few points first:
- What resolution and frame rates you want to work with?
- How many physical inputs and outputs you’ll need?
- If you’ll need a Mix Effect (M/E) bus, and if so, how many?
- How many keyers you’ll want to use?
- Standard or advanced chroma keying?
- How many media players and the clip and still stores you’ll need available?
- How much physical control you want?
Now you’ve taken the time to think over those points, you’re now better equipped to make the right decision on which ATEM would work best for you.
Still not 100% sure…here’s an in-depth summary on each requirement.
Resolution and frame rates
All of the following work in HD and support up to 1080p at 60fps:
If you’re looking to work in UHD 4K, all of the following support up to 2160p at 25/30fps:
- ATEM Television Studio Pro 4K
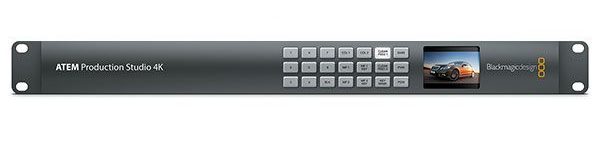
- ATEM Production Studio 4K
- ATEM 1 M/E Production Studio 4K
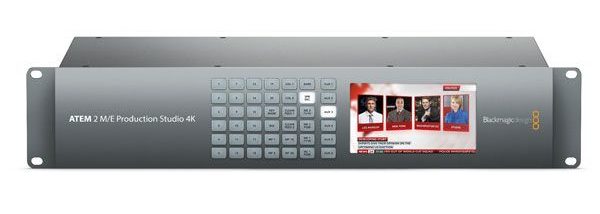
- ATEM 2 M/E Production Studio 4K
If you requiring 2160p at 50/60fps with 12G SDI* connections, you’ll need to opt for one of the following:
- ATEM Television Studio Pro 4K
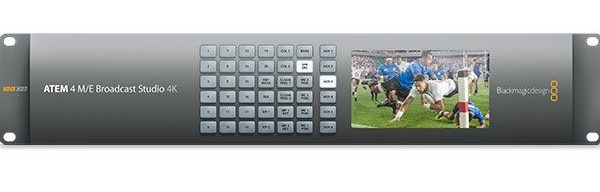
- ATEM 4 M/E Broadcast Studio 4K
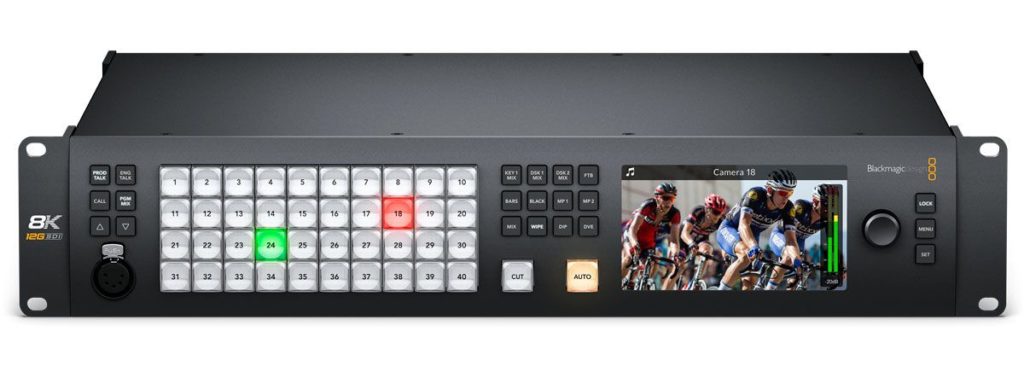
- ATEM Constellation 8K – this also supports not just UHD 4K at 60fps but also 4320P at up to 60fps.
*12G SDI: The current highest specification of SDI cabling which is used to connect video sources to the ATEM, as well as outputting from the ATEM to destinations. 3G allows up to 1080p60 transmission, 6G up to 2160p30, and 12G 2160p60.
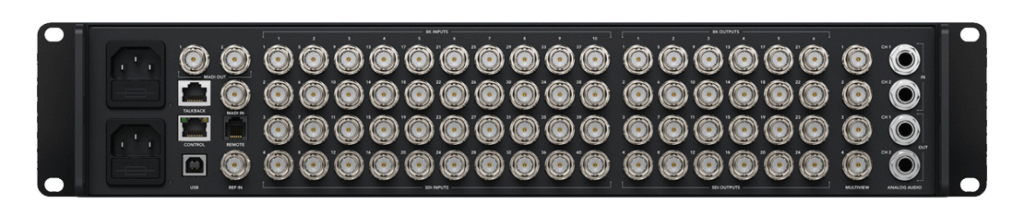
Inputs and Outputs (I/O)
Connectivity is going to be a big factor in selecting the right ATEM. The amount of inputs is straight forward to calculate, you just need to know the amount of video sources you’re intending to run in your production, and this could be cameras, playback devices (such as the HyperDeck range), or even a laptop etc.
The outputs are where you really need to give it more thought. You’ll ideally want to be able to route a return program feed to each of your cameras, as this is how you’ll be able to make use of remote camera control, tally, and talkback with Blackmagic cameras – whilst also offering the operator the ability of viewing the program feed. You’ll then want to account for the different recording devices and whether you’ll be running multiple screens, projectors, or auxiliary feeds to certain destinations.
Some of the ATEM models also have physical outputs dedicated to outputting what’s called a clean feed. This is the main program out* without the downstream keyers (more on that below), primarily used for outputting your show without graphics and text overlaid. The auxiliary output** can be configured to output a clean feed should the ATEM you want to use lack a physical clean output.
If you’re looking at an ATEM model that has fewer physical outputs than what you were needing, then you can always increase the flexibility of the system by incorporating one of the Blackmagic Smart VideoHubs into your setup. It’s always advisable to have more outputs than you think you initially require.
*PGM/Program Out: This is the main output from the ATEM switcher. This is what you’ll deliver to your audience whether that be via a live stream or projects onto a large screen at an event.
**Auxiliary Out: Auxiliary outputs are extremely flexible; they can be assigned to output any of the available video sources, composites, and effects within the ATEM. This could also be used to output what’s called a clean feed, which is the program out without any of the down-stream keyers overlaid.
M/E
The most basic part of a switcher is a bus*, usually a row of physical buttons on the mixer that each correlate to one of the multiple video inputs. Typically, you’ll have three buses;
- one for preview,
- one for program,
- and one for compositing called key – this is what we would call a 1 M/E (short for Mix/Effect) switcher.
On more complex switchers it’s possible to have multiple M/Es available. This allows you to create various effects, layered sources etc within the additional M/Es, and then make them live by simply selecting it as a source on the main program bus.
If you intend on compositing various layers and utilising a lot of effects in your live mix, then the more M/Es you have available in your ATEM, the more flexibility and capability you’ll have. To make it easier to visualise, imagine we have a 1 M/E mixer, this would allow us to create a simple Picture-in-Picture effect, consisting of having a presenter’s resized camera feed overlaid onto a PowerPoint presentation. If we want to then add another presenter camera overlaid onto an additional presentation, and cut between the two shots, then we’ve already used our one and only available M/E to do so – this is why having multiple M/Es becomes invaluable.
*Bus: The most basic part of a vision mixer, this is the term used to define a signal path that consists of multiple inputs that feed into a single output.
Upstream and Downstream Keys
All the ATEM switchers give you the ability to utilise upstream and downstream keyers, the amount available to you will vary per model. If you’re unsure of the function of keyers, it’s best to think of the program and preview rows on the switcher as being the ‘background’, to which the keyers can be overlaid on top.
All ATEM live production switchers include powerful upstream keying for amazing broadcast effects. Layer live video, titles, graphics and animation over live video or graphic backgrounds with incredible quality using:
Luma Key:
Luma keys are sometimes known as a self key because the same video source is used for cutting the key and overlaying the video image. You can do this with live video from a camera, prerecorded video from a HyperDeck or graphics loaded in the media pool. Luma keys work the best with high contrast images like white elements on a black background, so that you can use the contrast to cut the black background and replace it with live video or broadcast graphics.
Linear Key:
Get incredibly clean, high quality results with Linear keying by using two separate sources for the fill and the key to create one video image! The fill signal contains video to be stacked over the background, while the key signal contains a grayscale mask to cut out or mask the area to be filled. Fill and key signals can be graphics from the media pool, live motion video, or video and key from an external character generator or graphics system.
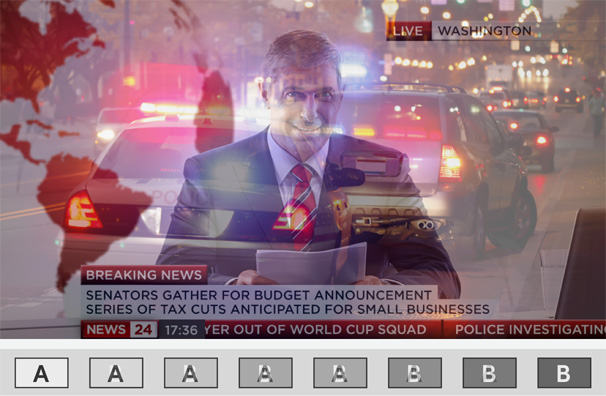
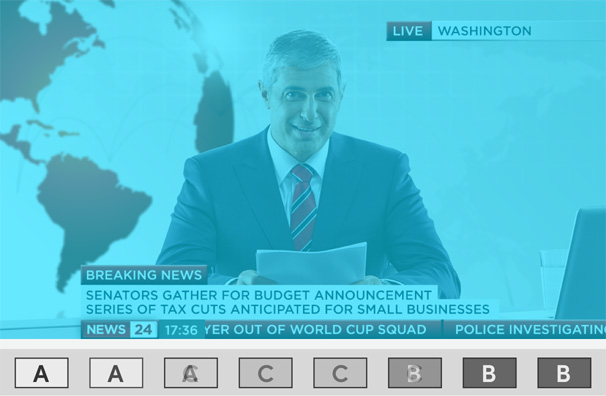
Chroma Key:
Used every day for TV weather forecasts, chroma keys are a very powerful way of combining live images together in real time, cleanly in high quality. The presenter stands in front of typically a green or blue background, and the chroma keyer will remove only that colour and combine it with another image such as prerecorded video or graphic. ATEM Switchers include multiple keyers so you can simultaneously combine multiple live, prerecorded, graphic and chroma key elements in real time.
Pattern Key:
Create amazing transitions with the pattern key. You can use any one of the 18 built in wipe patterns to combine live images or graphics with geometric shapes. The pattern keyer gives you full pattern control including softness, symmetry, size and position completely independent of the transition block. That means you can use pattern keys to create picture in picture effects that can be transitioned to as easily as any live camera source, and you don’t need to tie up your DVE!
All of which are overlaid before any transitions.
You get 4 built in upstream keyers and a DVE* in the ATEM 1 M/E Production Studio 4K, and the ATEM 4 M/E Broadcast Studio 4K has 4 advanced keyers for each M/E! That’s a massive 16 independent chroma keyers which means you can create mind blowing broadcast quality multi layer effects for your production.
Popular uses for an upstream key would be to remove a green screen background from a presenter camera (much like what broadcasters do for weather forecasts), or create Picture-in-Picture (PiP) compositions (think of a news broadcast having two presenters in different locations on screen at once).
The downstream keyers (DSK for short) behave in a similar fashion to the upstream keyers, with the key difference being they are overlaid over the preview/program bus post transitions. They operate independently to what’s selected as the ‘background’, making them ideal for bringing animated bugs or logos on screen. Unlike the upstream keyers, the downstream keyers in the ATEM range can only act as either a luma or linear key.
*DVE – short for Digital Video Effects, typically used in vision mixers to resize, distort, or move a video source within a frame. Perfect for live breaking news productions allowing you to create live crosses from the studio to the excitement on location
Chroma Key
All the ATEM models have a chroma keyer built-in as part of an upstream key. There are currently two variants to the chroma keyer; there’s the standard chroma keyer and the advanced chroma keyer.
Standard Chroma Key: Ideally used if you’re only going to be using a chroma key ad-hoc or if you’re streaming a heavily compressed output from the ATEM.
Advanced Chroma Key: Ideal if you intend on heavily shooting with green screen. You’ll get a lot more control and finesse in pulling a clean key with this option.

Creative Transitions
ATEM live production switchers have an amazing choice of transitions including Cut, Mix, Dip and Wipe patterns. The advanced 1 M/E, 2 M/E and 4 M/E models also give you key frame based DVE moves, flying graphics and animated stingers! Every transition is instantly available and you get full control of the transition type, pattern, length and more. With so many creative options you can always find the perfect ‘on air’ style, so there’s no limit to the combination of exciting effects you can create.
Cut:

The cut transition is the most simple and widely used of all transitions and you will use it continuously! When you press the cut button, ATEM instantly changes from current program source to the preview source precisely at the moment you hit the button. Cuts can be performed by directly selecting sources on the program bus or more commonly by pressing the cut button to transition to the next source lined up on the preview bus. Cut is easily the most popular transition.
Mix
One of the most elegant transitions in live production is the dissolve or mix transition. Gradually transitioning from one source to the next by creating a smooth blend between the sources brings out the emotion in your production. You can simply press the auto transition button to automatically trigger a mix between shots at a pre-set transition rate. You can use the t-bar to manually blend the transition for the perfect live mix.
Dip
Similar to mix transitions, a dip transition is a gradual blend from source to source however, the transition dips to an intermediate third source before completing the transition to the next shot. You can choose to dip to any color, a graphic from the media players or even a live video source. Use black or white for the intermediate source for incredible creativity. For sponsored live productions like sports events, use dip transitions to flash up a sponsor’s logos during the broadcast.
Wipe Patterns
ATEM Production switchers have 18 built in wipe patterns, which let you create over 100 different styles of wipe transitions! You can use circles, diamonds, squares and more to transition from one source to the another as you gradually expand the shape to reveal the next source. Patterns can be inverted, softened or have customized colored borders. You can also insert live video into borders creating wipe pattern transitions that include three live video streams at the same time.
DVE
The advanced 1 M/E, 2 M/E and 4 M/E models have a powerful built in Digital Video Effects processor or DVE. You can push, spin, squeeze and swoosh your live video from one camera to the next with incredible built in DVE transitions. DVE transitions can be flip flopped and reversed giving you even more transition options. You get over 35 exciting DVE preprogrammed moves to choose from. Using the DVE for transitions will increase the production value on any live production.
Graphic
When you want to combine sponsor logos with transitions during a live production, graphic transitions are the perfect solution! Use the DVE to create amazing flying graphic effects and logo wipe transitions. You can create high resolution logos in Photoshop CC using the included plug-in to load directly into the ATEM media pool. Photoshop CC graphics with premultiplied keys are perfect for smooth flying logos in the highest quality, as your logo moves across the screen, the shot transitions with a hidden wipe under the flying graphic.
Stinger
You can create exciting eye popping Stinger transitions by combining live video with animated graphics and sound effects. When you trigger a Stinger, your animation is instantly played back from a media player and keys over the live video as it wipes to the next shot. You also get simultaneously mixed sound effects with the live program output. Stingers are widely used for live sports broadcasts as great transitions to instant replays and back to the live action.
Media View
ATEM live production switchers let you connect loads of sources and monitor them all at the same time using the built in multi view. Multi view makes it easy to see your cameras, graphics, preview and program outputs on a single screen, meaning you don’t need lots of monitors to see all your individual cameras. You get HDMI and SDI multi view outputs so you can connect to professional broadcast SDI monitors or even low cost big screen televisions using the HDMI multi view output. The advanced ATEM 2 M/E Production Studio 4K model features 2 independent multi view outputs so you can see up to 16 cameras across 2 screens.
Media Players
Each ATEM has a built-in media pool, to which graphics and image sequences can be transferred from a computer to be stored in the ATEM. The amount of memory available to store these assets will vary across the range. For example, the ATEM Mini and Mini Pro can store 20 still images and has no clip store, whereas towards the other end of the spectrum the 4 M/E Broadcast Studio 4K can store 64 still images and has a clip store of 360 frames in 4K UHD – so if that ATEM is running a production in 4K UHD at 25fps, you’ll be able to play a clip of up 14.4 seconds long (360/25=14.4). Once the assets are loaded into the media pool they can be assigned to one of the available media players so that they can then be pushed live. The amount of media players available will again vary depending on the model of ATEM, from one in the ATEM Mini, to four in the Constellation 8K.
It’s important to note that the clip store is not designed to be used as a video play in, it doesn’t handle traditional video formats, instead it’s designed to handle image sequences for graphic transitions and animated graphics such as lower thirds etc. A model from the HyperDeck range is recommended for video playback, especially as they can be remote controlled right from within the ATEM software.
So, we’ve covered that you can load pre-created graphics into the media pool on the ATEM, but what is exciting is that it’s also possible to create and publish graphics by using Adobe Photoshop CC or Photoshop Elements whilst your production is live. With the ATEM Photoshop plugin installed on a computer connected to the same network as the ATEM, you can create complex graphics within Photoshop and export them straight to the Media Player on the ATEM, which can then be brought live at the push of a button. It’s a fantastic feature that’s used mostly creating name straps for anyone that appears on screen during your show on the fly.
Your ATEM and its Memory
You’ll want to be aware of the way the memory works within the ATEM range. There are six ATEM models that have non-volatile memory;
- the ATEM Mini,
- ATEM Mini Pro,
- Television Studio HD,
- Television Studio Pro HD,
- Television Studio Pro 4K,
- and the Constellation 8K.
What does this mean? Well, it means once you power off the ATEM and turn it back on again for your next production all the previous settings, including what’s in your media pool and media players, will be recalled. In contrast, a volatile memory system loses its stored data when power is lost.
Physical Control
All the ATEM models feature physical controls on the main unit, and some of them will even allow you to control every aspect of the switchers settings without having to use the software control panel. However, if you’re wanting to speed up the process of manipulating these settings, switching sources, and running layered graphics on the fly, you’ll likely want to use a control surface that has these functions mapped out so that they can be triggered at the push of a button.
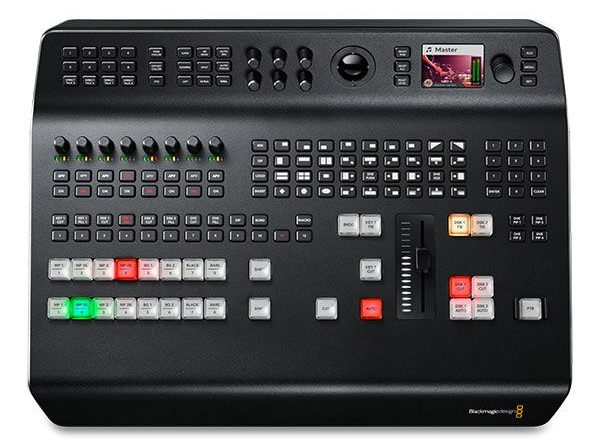
The ATEM Mini, Mini Pro, Television Studio Pro HD and Pro 4K have this added control surface built into the switcher itself. If you’re looking at the other ATEM models, then you’ll potentially want to opt for including the Blackmagic ATEM 1 M/E advanced or the 2 M/E Broadcast panels in your setup. These panels connect to all the ATEM switchers seamlessly using a standard Ethernet cable. If you want to keep your setups physical footprint to a minimum, you can control all aspects of the ATEM via the software control panel on a computer connected to the same network (or just simply attached directly to the ATEM by an ethernet cable).
If you’re working on larger productions, you may also want a dedicated control surface to act as a CCU (Camera Control Unit)*, typically used mainly in broadcast scenarios. Again, Blackmagic have a panel like the Advanced panel for this function alone, called the ATEM Camera Control Panel, allowing a single operator to control up to four cameras at any one time. The Blackmagic Design cameras that can be remotely controlled by ATEM over SDI are; the URSA Broadcast, URSA Mini Pro, Studio and Micro Studio. More recently however, thanks to Blackmagic camera update 6.9 and the launch of the ATEM Mini Pro, the Blackmagic Pocket Cinema Camera (both 4 and 6K models) now allow for remote camera control over HDMI.
*CCU (Camera Control Unit):In broadcast, typically the camera operator will control their framing and focus whilst another operator in the control room adjusts the overall look coming from the camera (colour balance and shutter speed etc). This secondary operator concentrates on the quality and consistency of the images coming from the cameras and uses a CCU to make adjustments.
Live Streaming
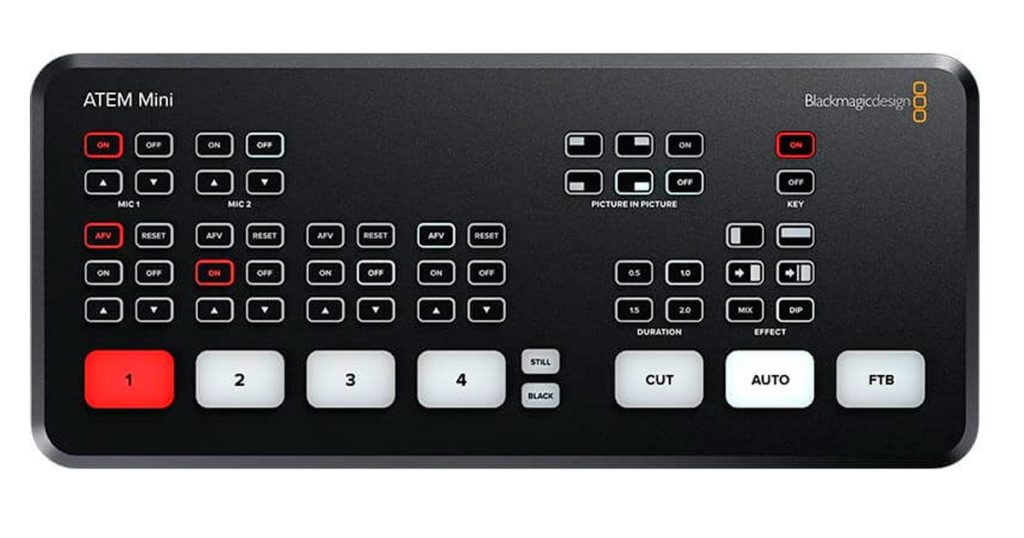
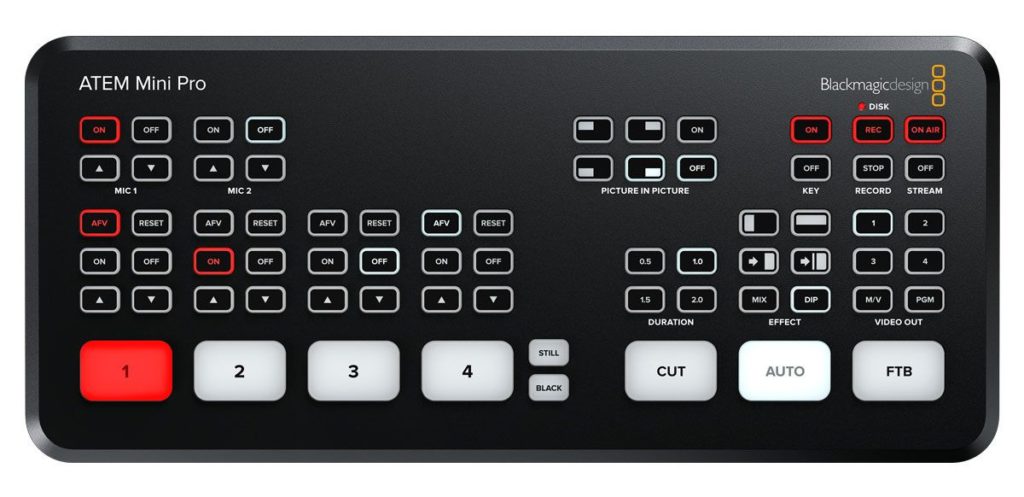
At the more budget friendly side of the product line-up, is the ATEM Mini and ATEM Mini Pro (with the latter being the newest addition), but don’t be fooled into thinking that they don’t come with a few unique tricks up their sleeve. Unlike the other ATEM models, the ATEM Minis can get you live streaming straight out of the box (assuming you have cameras already). Either model will show up as a USB webcam when connected to a computer via the USB-C port, sending the main video output of the ATEM. It’s then simply a case of going live on your chosen platform and instead of using your computers built-in webcam, you simply select the ATEM option. Although very straightforward, this still relies on the computer to do some of the processing, encoding the video stream to your chosen platform. If you’re not confident that your chosen machine has the grunt to reliably do that, the ATEM Mini Pro is the ideal solution. Along with its built-in multiviewer, and ability to record to external storage, the Pro model is the only ATEM to feature a built-in live streaming encoder, allowing you to offload that live processing work solely to the ATEM – which is going to perform day-in-day-out.
The ATEM is an incredibly powerful live production tool, it’s the heart and brains of the live ecosystem. So to help you choose the right model, we’ve put together a quick ‘Comparison Guide‘ based on the key points we’ve highlighted in this article.
For more information, please contact us either through our ‘chat’ function, email: [email protected] or by phone: 0203 137 2901; we’re always here and happy to help.
Featured in this article:

[…] The ATEM is an incredibly powerful live production tool, it’s the heart and brains of the live ecosystem. So to help you choose the right model, we’ve put together a quick comparison guide based on the key points we’ve highlighted in our previous article – Choosing the Right Blackmagic Design ATEM for the Job. […]